Chen Tai Chi Hand, Stance, Footwork & Legwork Guide
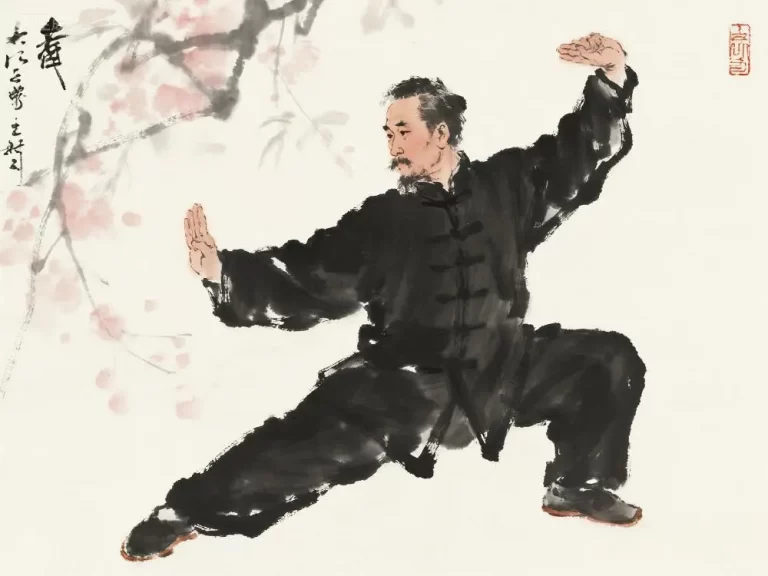
Taijiquan‘s every move and action contains a lot of wisdom and boxing theory. Today, we will share with you the illustrations of Chen-style Taijiquan‘s hand pattern, step pattern, footwork, and legwork in the hope that more people can understand Taijiquan and practice Taijiquan, so as to reap the rewards of a healthy body and a serene heart.
Read navigation
Hand Patterns
1. Fist Patterns
Four fingers are together, curled inward into the palm, with the thumb pressing against the second joints of the middle and index fingers. The fist should be flat, forming a four-sided shape. Avoid clenching too hard or leaving a gap inside the fist.
Flat Fist: The fist remains the same, with the palm facing downward. (See Figure 3)


Standing Fist: The fist remains the same, with the back of the fist facing upward. (See Figure 4)


Tilted Fist: Fingers are naturally clenched, with the back of the fist facing downward.
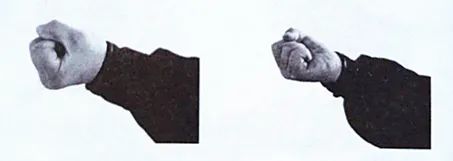
Key Point: Practice clenching and unclenching the fist to achieve natural, flexible, and accurate movements.
2. Palm Patterns (Ridge Palm)
- Fingers are naturally straight, with the thumb and little finger root slightly inward. The index finger is slightly outward, and the tiger’s mouth is tightened.
- Standing Palm: Wrist is slightly bent, fingertips pointing upward, fingers naturally extended. The little finger root and thumb root are slightly inward, and the thumb is slightly outward. (See Figure 5)
- Tilted Palm: Palm faces upward or diagonally upward. (See Figure 6)
- Top Palm: Palm faces downward. (See Figure 7)
- Horizontal Palm: The little finger side faces outward. (See Figure 8)
- Key Point: Practice changing palm shapes by alternating left and right hands during spare time, or combine with Taiji桩功 (posture training).
3. Hook Hands
- The thumb, index, and middle fingers are pinched together, while the remaining fingers are naturally bent inward into the palm. The tiger’s mouth is rounded, and the wrist is slightly flexed. (See Figure 9)
- Precautions: Avoid stiffness; keep the hand loose and natural. Practice hook hands during spare time and combine with Taiji桩功.
Step Patterns
1. Bow Stance
- Stand with feet front and back. The front leg is bent at the knee (knee should not exceed the toes), and the back leg is slightly bent. Both feet point diagonally forward, with the center of gravity shifted to the front leg. The right stance is the same as the left, but in the opposite direction. (See Figure 10)
- Precautions: Practice alternating left and right stances with commands. Combine with hand maneuvers like “Diagonal Step” for better results.
2. Horse Stance
- Stand with feet parallel, about three feet apart. Squat with knees bent, keeping the thighs slightly above horizontal. Sink the hips, tuck the buttocks, and keep the upper body straight. The center of gravity shifts to the right for Right Horse Stance and to the left for Left Horse Stance. (See Figure 11)
- Precautions: Practice alternating left and right stances with commands. Combine with maneuvers like “Grasp and Strike” for better results.
3. Virtual Step
- Both legs are bent at the knees, with about 5 cm between the heels vertically and horizontally. The front foot is solidly planted, while the back foot rests lightly on the ground with the heel lifted. (See Figure 12)
- Right Virtual Step: Left leg supports the weight, right foot points forward with the heel lifted. (See Figure 13)
- Precautions: Practice alternating left and right virtual steps with commands. Combine with maneuvers like “White Crane Spreads Wings.”
4. Servant Step
- Right Servant Step: Left leg is bent at the knee, supporting the body weight. The right leg is straightened and lowered, with the entire foot flat on the ground. (See Figure 14)
- Left Servant Step: Same as Right Servant Step, but in the opposite direction.
- Precautions: Practice alternating left and right servant steps with commands. Combine with maneuvers like “Sparrow Dives to the Ground.”
5. Resting Step (Pan Step)
- Right Resting Step: Lift the right foot and step forward, landing to the left front of the left foot with toes pointing outward. The left heel lifts, and both legs squat deeply. (See Figure 15)
- Left Resting Step: Same as Right Resting Step, but in the opposite direction.
- Precautions: Practice alternating left and right resting steps with commands. Combine with maneuvers like “Covering Palm.”
Footwork
1. Progress (Moving Forward)
- Start with fists half-clenched at the waist (See Figure 16). Pivot the right foot outward on the heel, turning the body to the right. Shift the center of gravity to the right leg, lift the left foot, and slide it forward with the inner heel grazing the ground. The heel touches down first, followed by the toes. Finally, shift the center of gravity forward into a bow stance (See Figure 19).
- Precautions: Use natural breathing. Avoid sudden shifts in body weight. Practice keeping the head level (e.g., balance a book on top). Combine with退step practice.
2. Retreat (Moving Backward)
- Shift the center of gravity to the left leg and lift the right heel (See Figure 20). Withdraw the right foot diagonally backward, passing it inside the left foot (See Figure 21). Shift the center of gravity to the left leg, and finish in a three-body stance with the left foot pivoting inward (See Figure 22).
- Precautions: Inhale when lifting the foot and exhale when landing. Practice keeping the body steady. Combine with progress steps and maneuvers like “Retreating Elbow Strike.”
3. Wiping Step
- Shift the center of gravity to the right leg and squat deeply. Lift the left foot and place it against the inner ankle of the right foot, toes pointed upward (See Figure 24). Slide the left foot along the ground to the left, keeping the heel close to the ground. Once the foot is about three feet away, pivot the toes forward and shift the center of gravity to the left leg (See Figure 26).
- Precautions: Inhale when lifting the foot and exhale when sliding. Combine with maneuvers like “Front Stomp.”
4. Cross Step
- Start in a parallel stance (See Figure 1). Turn the body to the right (chest faces southwest), squat deeply with the right leg, and step to the left with the left foot while pushing the palms forward (See Figure 30). Turn the body to the left (chest faces forward), shift the center of gravity to the left leg, and insert the right foot diagonally backward. Pivot the left palm upward and arc it to the left chest (See Figure 31). Step forward with the left foot and push the palms forward again (See Figure 32).
- Precautions: Maintain a 45-degree turning angle. Practice rhythmically and combine with “Cloud Hands” for fluid transitions.
Legwork
1. Single Vibrating Foot (Right Vajra Pounding Pestle)
- Knee Raise and Fist Raise: Shift the center of gravity to the left leg and squat. Raise the right knee to belly height, foot toes pointed upward. The right fist is raised to chest level, just 1 cm away, with the back of the fist slightly tilted upward. Keep the upper body straight. Focus on the right fist (See Figure 34).
- Shock Foot and Smashing Fist: Lower the right foot gently to the ground, shift to a squatting stance, and smash the right fist onto the left palm. The center of gravity is between the legs. Focus forward (See Figure 35).
- Precautions: Inhale when raising the knee and fist; exhale when shocking the foot and smashing the fist. Ensure both actions are synchronized. Keep the body centered and maintain clear weight distribution.
2. Double Shocking Feet
- Squat and Press Palms: Shift the center of gravity to the left leg, slightly withdraw the right foot, and form a false step. Press both palms downward, slightly below chest level. Focus on the right hand (See Figure 36).
- Jump and Knee Raise: Swing the right leg upward while stomping the ground with the left foot. Both palms wrap upward in front of the chest. Land sequentially with the left and right feet, pressing the palms downward again (See Figure 36).
- Precautions: Exhale when squatting and pressing palms; inhale when jumping and raising the knee. Coordinate the leg swing with the arm movement for a smooth jump. Land lightly on the back foot and heavily on the front foot.
3. Right Stomping Foot
- Shift the center of gravity to the left leg and raise the right foot. Both hands are closed in front of the abdomen with palms standing upward (See Figure 38). Extend the right leg forward, using the heel as the striking point. The leg should be straight, and the foot should pass waist height. Use the rebound force to bend the knee. Push the right palm forward, arm slightly bent, wrist at shoulder height. Raise the left hand above the head, palm slightly upward. Focus on the right hand (See Figure 39).
- Precautions: Stomp and palm push must be done simultaneously. Keep the body straight and stable. Inhale when closing the foot; exhale when stomping. Practice alternating left and right stomps.
4. Right Tapping Foot
- Shift the center of gravity to the left leg and raise the right foot. Both hands are held in front of the chest with palms slightly upward (See Figure 40). Spring the right foot forward, leg straight, toes pointed. As the foot extends, spread the arms downward. Tap the right foot with the right hand while lowering the left hand to shoulder height, palm facing right. Focus on the right hand (See Figure 41).
- Precautions: Coordinate the arm spread with the foot kick. Tap the foot quickly and accurately. Inhale when lifting the knee and cupping the arms; exhale when tapping the foot. Practice alternating left and right taps.
5. Right Outward Pendulum Lotus
- Shift the center of gravity to the left foot and raise the right foot. Both hands are positioned in front of the right side with palms facing downward (See Figure 42). Swing the right leg in an arc from flexion to extension, moving left, upward, and right. When the foot reaches chest height, tap it sequentially with the left and right hands. Focus on the right hand (See Figure 43).
- Precautions: Inhale when lifting the knee and swinging the palms; exhale when tapping the foot. Complete the movement smoothly. Before swinging the leg, bend the knee, close the hips, and turn the waist. Tap the foot quickly and accurately. Practice alternating left and right outward pendulum lotus kicks.
6. Right Side Kick
- Shift the center of gravity to the left leg and raise the right knee. Both fists are crossed in front of the chest and abdomen, with the right fist on the outside (See Figure 44). Extend the right leg outward, using the outside edge of the foot as the striking point. The foot should reach waist height. Simultaneously, raise both arms upward to shoulder height, fists level with the shoulders and palms slightly downward. Focus on the right fist (See Figure 45).
- Precautions: Coordinate the side kick with the arm movement. Exhale when executing the kick. Use the rebound force to slightly bend the knee after kicking. Inhale when raising the knee and fists; exhale when performing the side kick. Practice alternating left and right kicks.
7. Right Two Kick
- Shift the center of gravity to the right leg and raise the left knee. The left fist arcs upward, forward, and downward to the left front of the shoulder (See Figure 46). Stomp the right foot to lift the body, extend the right leg forward in the air, and tap the foot with the right palm when it reaches chest height. The left palm arcs upward to the left, level with the shoulder, palm facing downward. Focus on the right hand (See Figure 47).
- Precautions: Coordinate the upward step with the arm swing. Tap the foot accurately. Inhale when lifting the knee and arcing the arms; exhale when tapping the foot and landing. Practice alternating left and right kicks.
